
Need a developer or support team on your site to troubleshoot or tweak? Granting access can be done quickly, easily, and safely.
It’s the very common practice. Every WP setup is different, so our devs want to see what exactly is causing the problem in your case. You can create a separate admin account just for the support team. Once we fix the bug, you can change the password or delete the account.
The list of WordPress Credentials
- WordPress Administrator email address, username, password, and login URL (this frequently, but not always, looks something like this: https://www.example.com/wp-admin/)
- FTP or SFTP username, password, hostname, and (for SFTP) port number.
- Hosting panel, such as cPanel (most hosts have some sort of hosting manager) username, password, URL
- MySQL database credentials (these are stored in the wp-config.php file and can be retrieved via FTP if you have a working site): database hostname (maybe “localhost”), database name, database username, database password
- Registrar where you purchased your domain name: email address, username, password, URL
- Optional Third Party DNS manager (this maybe your host or your registrar, but not always): email address, username, password, URL
- Optional Third Party CDN (such as MaxCDN or CloudFront): email address, username, password, URL
What do We Need to Fix your Site?
To solve the main problems we need:
- WordPress Administrator email address, username, password, and login URL (this frequently, but not always, looks something like this: https://www.example.com/wp-admin/)
- FTP or SFTP username, password, hostname, and (for SFTP) port number.
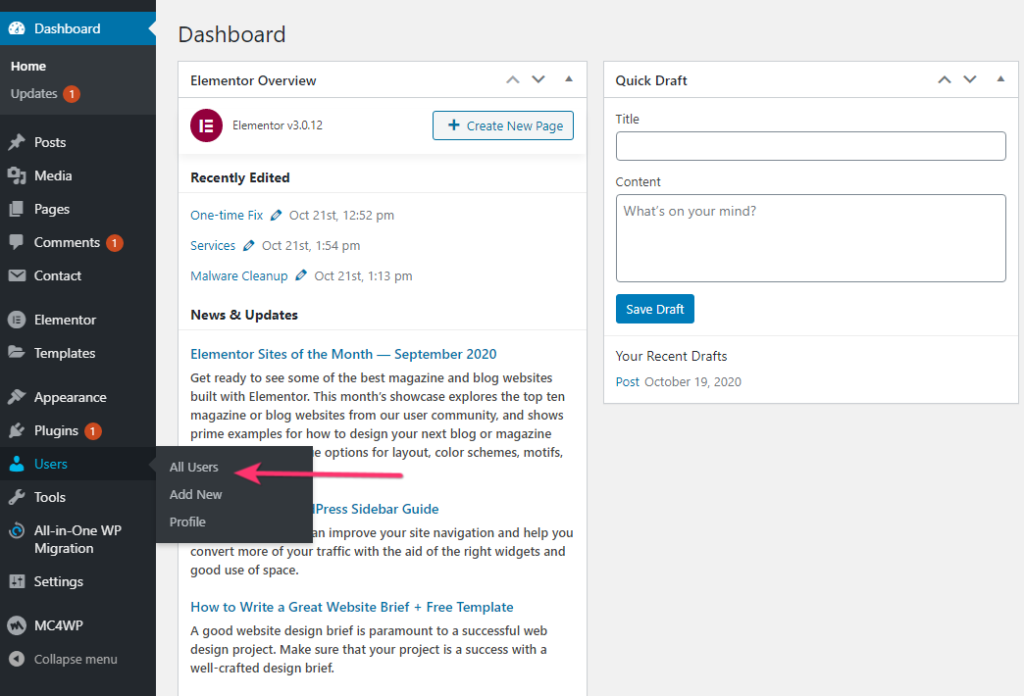
How to Create Temporary Login Credentials for WordPress Support?
Creating a new user account in WordPress is super simple. Just head to Users > Add New in your dashboard. It’ll look like so:

To create temporary login credentials for WordPress support or development, there are really only 3 important pieces:
- Username
- Password
- Role
The username and password will be passed to the support team or individual doing the work. The Role should be set to Administrator as pictured above. WordPress wants an email address, but it can be any of your choosing and does not need to be passed on.
With Username, Password, and Role taken care of, click Add New User. You now have a temporary admin account!
How to Create FTP for WordPress Support?
What is FTP (and why is it important)?
So, what is FTP? File Transfer Protocol (FTP) is a way of transmitting information between a server and client. Your website’s files are stored on your web host’s servers, and you can use FTP to access those files from your computer. Any changes you make will be automatically implemented on the server itself.
There are many reasons you may need to access your site this way. For example, you can use FTP to:
- Install plugins and themes directly, should you need it.
- Manually deactivate plugins and themes if you ever get locked out of your WordPress dashboard.
- Upload media files in bulk, rather than one at a time.
- Make changes to core WordPress files such as .htaccess, to implement customizations and extra security measures.
- Diagnose and fix common errors on your site, such as compatibility issues, internal server errors, and so on.
How FTP usually Looks Like?
HostName = “11.111.11.111”,
UserName = “wpfasthelp”,
Password = “wpfasthelp123”
How to Create FTP?
- Log in to the cPanel for your hosting account.
Enter your specific hosting account username and password in the login fields and click OK. - Click the FTP Accounts link or icon in cPanel.
FTP Accounts page opens. If your hosting provider automatically sets you up with an FTP account, then you see it listed in the Account Management section. Usually, the default FTP account uses the same username and password combination as your hosting account or the login information you used to log in to your cPanel in Step 1. - Type your desired username in the Login field.
This creates the username of username@yourdomain.com (where username is the desired username you typed and yourdomain.com is your specific domain name). - Type your desired password in the Password field.
You can choose to type in your own password or click the Password Generator button to have the server generate a secure password for you. Retype the password in the Password (Again) field to validate. - Check the Strength indicator.
The server rates your password with these options: Very Weak, Weak, Good, Strong, or Very Strong. You want to have a very strong password for your FTP account that’s very hard for hackers and malicious Internet users to guess and crack. - Type the directory access for this FTP user.
Leaving this field blank gives this new FTP user access to the root level of your hosting account, which, as the site owner, you want. If you set up FTP accounts for other users, you can restrict their access to your hosting directory by indicating which directory the FTP user has access to. - Set the space limitations in the Quota field radio button to Unlimited.
Because you’re the site owner, leave the radio button selection to Unlimited. (In the future, if you add a new FTP user, you can limit the amount of space, in Megabytes (MB) by selecting the radio button to the left of the text field and typing the numeric amount in the text box; for example: 50MB.) - Click the Create FTP Account button.
A new screen with a message that the account was created appears. Additionally, the settings for this new FTP account appear, which you should copy and paste into a blank text editor window (like Notepad for PC, or TextMate for Mac users).
